Outfitting my Godox CB-06 bag

How I outfitted my new Godox CB-06 bag with my gear so others may get an idea on what this bag can hold.

I needed a large bag with wheels to store/carry my new gear in and I saw a bunch of bags ranging from $60 way up to $500. Since I have a machine shop in my garage and I can fabricate or fix about anything I figured that as long as the canvas material and zipper would hold up then I can fix anything that may fail on a bag. I also know that I won’t be a power user that drags their gear on the road a lot and I suspect that I may do less than 10 shoots a year off-site.

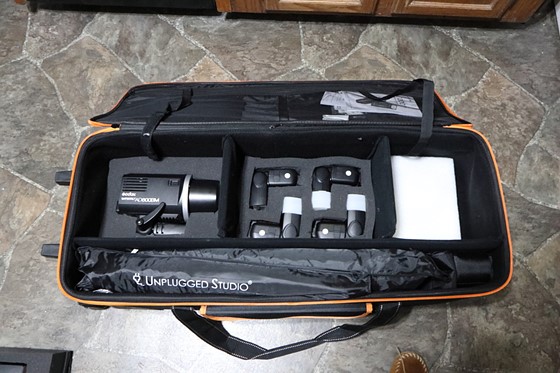
Since I feel that these Godox flashes are good quality I decided to get their CB-06 ($80) bag a try. I did see some bad reviews on Amazon but the majority of them were positive and again I figured I could fix anything if needed. The three dividers that are shown in the bag come with it and are velcro’d in place so they can be repositioned any way you need. There are also several flat pieces that can be used to separate layers of equipment but these are not rigid. The pieces are shown to the right of the equipment.

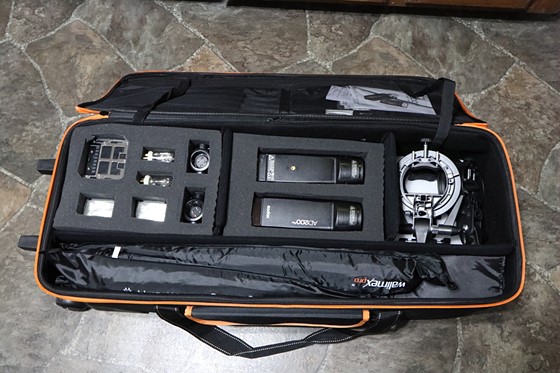
To hold all my new gear I customized the compartments with removable foam inserts that are cut to fit each component. I used 3″ thick and 1″ thick foam from Amazon to make the removable inserts and the foam was hot glued together in layers. There are essentially two levels of components that are stacked on top of each other and the removable inserts have a piece of plastic as a base to give them support when taking them in/out of the bag..

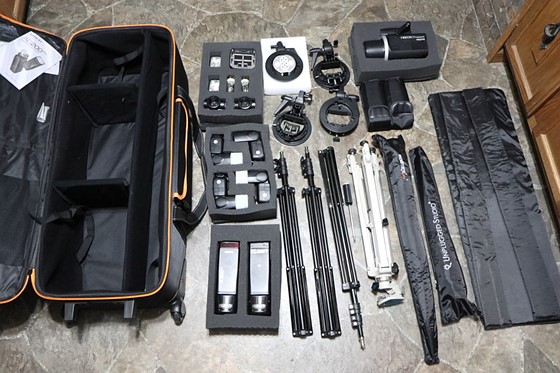
Below are pics of all the gear and how they are stacked in the bag.

CONTENTS:
2 – Godox AD200Pro Flash units installed with Optional H200R flash heads
AD200Pro packaged accessories (Bulbs, Fresnal Flash heads, etc)
1 – Godox AD600BM with Battery (Battery not assembled on flash while in bag)
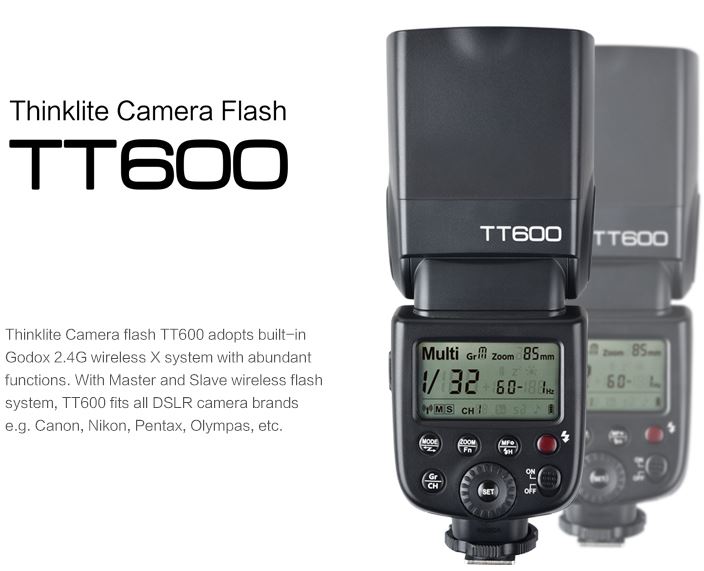
4 – Godox TT600 Flash units
1 – Godox AD-B2 Dual Power Head
3 – Neewer S-Type brackets
1 – Camera Tripod
3 – Light Stands
1 – 33″ Umbrella
1 – 43″ Umbrella
2 – TT600 flash Bags for small items.I don’t have any of the battery chargers in the bag since I won’t need them while off site but they could fit in pouches that are built into the bag.

Hopefully this helps someone.

Review of Godox TT600 Speed Light and X-Pro.

Here is my review of a pair of Godox TT600 Speed Lights and Godox X-pro:
To start with I purchased a kit from Amazon (approximately $190) that included two Godox TT600 speed lights and the Godox Xpro-C TTL Wireless Flash Triggers.

Godox X-Pro Wireless Trigger

I had initially purchased an Altura flash kit (approximately $70) that included two speed lights and the necessary transmitter/receiver but I returned it because the speed lights would time out within minutes which wasn’t adjustable.

The first thing I notice about the Godox lights was how much more heavy they were compared to the Altura pieces. The Godox units felt heavier and far more solid and robust giving them a more professional feel than the lighter Alturas.

Godox TT600 Speed Light

The second thing I noticed was no batteries. After a quick count of how many I needed ( Four AA batteries for each light and Two for the transmitter = 10) I made a trip the the local store. Once the transmitter was powered up I studied the LCD menu along with the Ultra Tiny text in the included instruction manual. The instruction manual is nearly impossible to read so it was off to search the internet on how to link the transmitter to the speed lights. At the time of this writing there was no videos showing how to connect the X-Pro to the TT600 lights but I did find one on how to connect it to the TT685 lights…but not much help since the menus on the two different lights are different. I would be glad to do a video on how I got them to connect but I have no idea how I did it. After just messing with the menus they connected.

For those new to speed lights here is the general idea:

The transmitter that mounts on the camera hot shoe needs to know how many lights you are using. Each speed light is located on a separate “Grid (Gr)”. So the first thing to do is to power up the speed lights and issue them both onto different grids: Gr A and Gr B.

Even though these are on separate grids (A and B) they will be controlled on the same Channel by the transmitter. So set each light so they both display Channel 1.

Now power up the transmitter and make sure you see Ch 1 at the top. As you look at the display Chanel 1 shows A, B, C, D, E down the side. These letters correlate to the grids letters above and with two speed lights we are only using A and B. Activating these to grids will show you the settings that each light is programmed with.

What I found extremely handy was the ability to change each light using the transmitter on the camera instead of having to walk over to the light and adjust it there.

NOTE: Do NOT forget to turn all the power switches off. Apparently I forgot to turn one of the lights off and the batteries were nearly dead the next morning. Instead of buying more AA batteries I decided to purchase 12 AA Rechargeable batteries and a recharging station. This system alone was only a little bit more expensive than buying more batteries at the store.

For several days now I have been playing with this system in Manual mode where I can control the light settings individually and separately from the camera and I have to say that I really like these lights. For what I do these units are perfect and and think any beginner will benefit from these units. ks